Step 2 - Load a new material type and create textures for the car body
To use a texture you need a material type that supports textures. When you create an empty project in Kanzi Studio it does not include any material types or materials. However, Kanzi Studio comes with a set of material types you can use and modify to suit your needs. You can find all available material types in <KanziInstallation>/Studio/Asset Library/MaterialTypes/General. In this step you use a material type from that location.
Whenever you import 3D models into Kanzi Studio, the materials used in the models are imported too. You can see all available material types, materials, textures, and brushes in a project in Library > Materials and Textures.
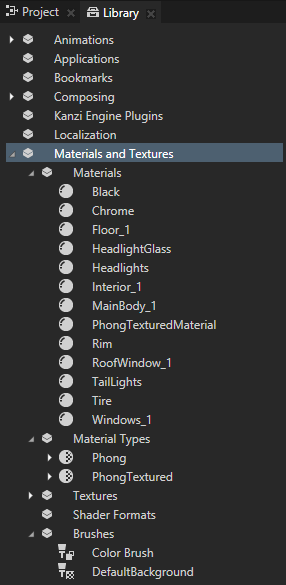
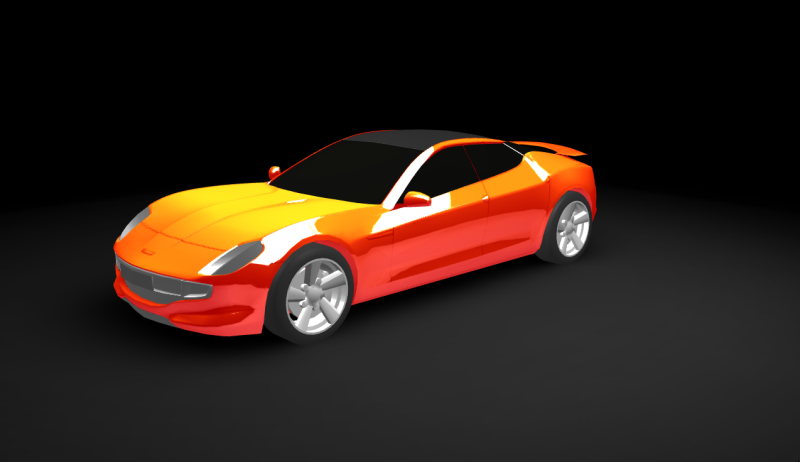
In this step you first load a new material type and then create a single and a cubemap texture for that material. In this step you use this cubemap material for the car body, but in later steps you assign the same cubemap to other car parts: rims, windows, headlights, and chrome parts.
Load the PhongTexturedCube material type
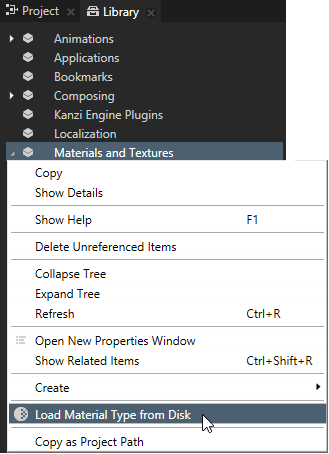
- In the Library right-click Materials and Textures, select Load Material Type From Disk, go to <KanziInstallation>/Studio/Asset Library/MaterialTypes/General, select PhongTexturedCube.kzmat material type and click Open.
Kanzi Studio adds PhongTexturedCube material type to Materials and Textures > MaterialTypes.
- In the Library > Materials and Textures > Materials select MainBody_1, and in the Properties set Material Type property to PhongTexturedCube.
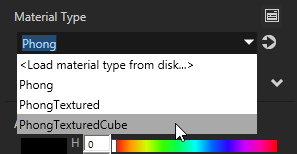
Since you just loaded the PhongTexturedCube material type, any material of that type uses the default texture. In the next section you create the cubemap texture for a material that uses PhongTexturedCube material type.
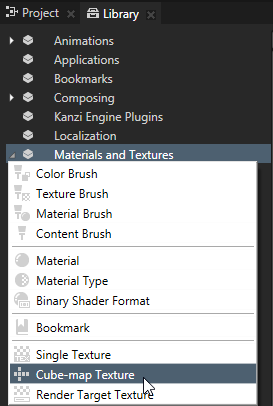
Create textures for the car body
- In the Librarypress Alt and right-click Materials and Textures, and select Cube-map Texture.
For example, name the texture CarBodyCubemapTexture.
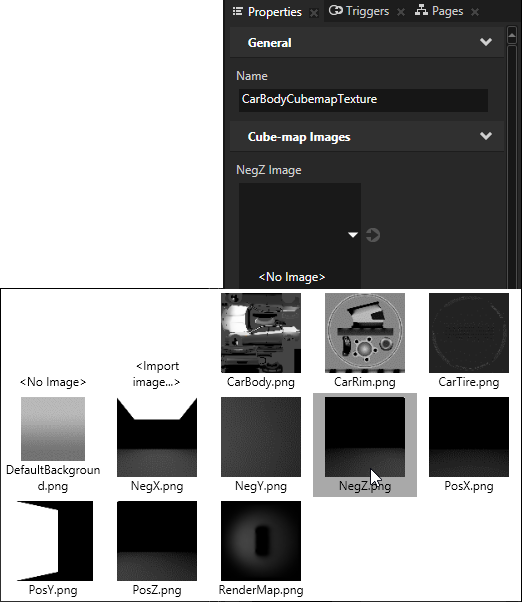
When you create a cubemap texture Kanzi Studio shows it in red type because the texture does not yet have textures assigned for each side. You do this in the next step.
- In the Properties of the CarBodyCubemapTexture set the Cube-map Images properties to their respective images. Set the NegZ Image property to image NegZ.png, PosZ Image property to PosZ.png, and so on until you set all the images.
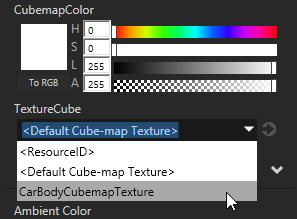
- In the Library > Materials and Textures > Materials select the MainBody_1 material and in the Properties set the TextureCube property to CarBodyCubemapTexture.
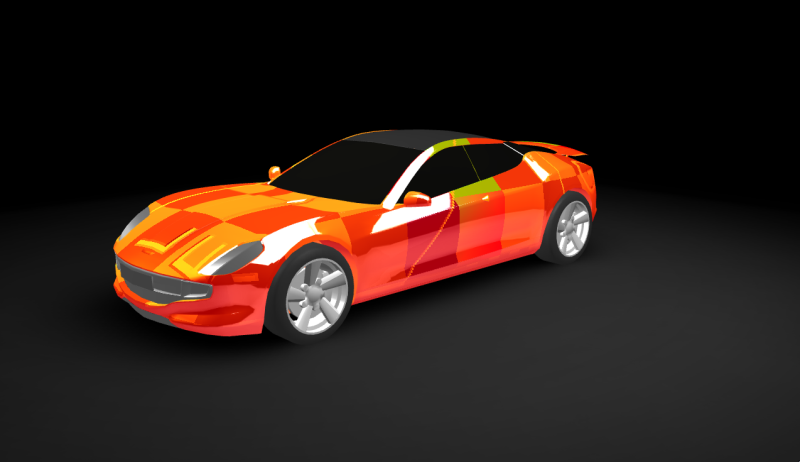
Now that you assigned the cubemap texture to the car, you can see the reflection of the environment on the car body. Next you create the texture for the car body.
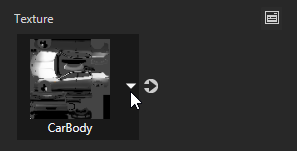
- In the Library > Materials and Textures > Materials select the MainBody_1 material and in the Properties set the Texture property to the CarBody texture.
< PREVIOUS STEP
NEXT STEP >
See also
Creating textured materials
Using cubemap textures
Using single textures
Material types and materials
Textures

Open topic with navigation